Your Complete Guide To Self Tapes
By: Eddie Ramos | August 12, 2025 11:02 AM

In the years since the pandemic, auditioning has taken on more formats than we ever thought possible—self-tapes, live virtual callbacks, occasional in-person reads, and even hybrid setups. While in-person auditions have made a comeback, they’re still often carefully managed: digital check-ins, staggered time slots, and minimal waiting-room mingling. You might not cross paths with another actor until you step into the room, but once you’re in, the stakes—both artistic and logistical—are high.
Virtual auditions via Zoom are still in the mix, especially for early rounds, but they bring their own hazards—lagging connections, camera freezes, and the occasional accidental cat cameo. (A whole article could be written about that side of things.)
The one constant through all of it? Self-tapes. They proved themselves “pandemic-proof” and have only grown more entrenched in TV, film, and even commercial casting. For many roles, the first—and sometimes only—round happens via a self-tape.

What Makes A Good Self Tape?
While some actors swear by professional self-tape studios, not everyone can justify the expense, make the commute, or even has one nearby. The good news? With the right setup, home self-taping can absolutely deliver professional-quality results.
It all starts with the two pillars of a great self-tape: lighting and sound. From there, it’s about framing, background, and performance—but nailing those first two will instantly elevate your tape.
To See or Not to See
Lighting, lighting, and—did I mention—lighting! If casting can’t see every subtle eyebrow raise, single tear, or art-house-style micro-expression, is it even worth it? Well… maybe. The truth is, casting just needs to clearly see you. And achieving good (even great) lighting doesn’t require a full studio setup. You’ve still got the same three trusty options: natural light, ring lights, and softbox lights.
Natural Light
Natural light is still the most budget-friendly choice—unless someone figures out how to monetize the sun, in which case we’re all in trouble. The key is to position yourself so the window is behind the camera, allowing the light to fall evenly on your face and torso. Keep the window directly in front of you—if it’s too far to one side, you’ll end up with the dreaded half-lit face, which might work for a moody thriller but not for your upbeat rom-com audition.
Once you’ve finished your tape and are ready to edit, Mac users can still turn to iMovie, while PC users can use Windows Clipchamp (Windows Movie Editor’s newer, sleeker cousin). Both have simple auto-enhance or color-correct tools that can add that final polish. If your natural light is already spot-on, you might not need to tweak much—but sometimes that one-click adjustment gives your tape the extra crispness it needs. Use your judgment.
Ring Light
Ring lights have gone from niche gear to the “little black dress” of home video setups—perfect for auditions, virtual meetings, and yes, even the occasional Zoom date (if those are still a thing… asking for a friend).
They’re relatively affordable and worth adding to your self-tape toolkit. Prices still range from budget-friendly to professional-grade, so a little research goes a long way before you click “Buy Now.” Personally, I use mine to supplement natural light. Since my window isn’t perfectly in front of me, the ring light fills in those shadows and keeps my face evenly lit. Combine that with a quick auto-enhance, and the tape looks ready for its close-up.
Softbox Light

If you can afford it—and have the space—softbox lights are a fantastic upgrade. Depending on whether you get a single or a set, they can range anywhere from about $50 to $200. They provide bright, even lighting and one huge perk: you can tape at night. Like ring lights, they give you flexibility to record anywhere in your home with a nearby outlet, so you’re not stuck using the one wall blessed by daytime sunlight.
Soundcheck!
Arguably even more important than lighting—yet harder to control. We’ve all been there: the garbage truck rumbling past mid-scene, the leaf blower revving up right outside, or the neighbor’s heated argument becoming your accidental soundtrack. Not ideal when you’re delivering your quietest, most emotional lines.
The good news? Most modern smartphones have excellent built-in mics that can capture clear, crisp sound without extra gear. Once you’ve uploaded your footage into your editing program, you can use built-in audio enhancement or noise reduction features to smooth things out and minimize background distractions. It won’t erase every rogue siren or barking dog, but it can make your final tape sound clean and professional.
Lavalier Microphones

These little clip-on mics attach right to your lapel and can plug into your phone or camera via a wire—or connect wirelessly if you go for one of the newer Bluetooth models. Because they sit so close to your mouth, lavaliers do a great job of picking up every breath, swallow, or perfectly-timed chuckle you work into your audition. They typically range from around $15 to $80, so do a bit of research before you commit.
The main drawback? Wired lavs can limit your movement, and whether wired or wireless, the mic will almost always be visible in your shot. If that doesn’t bother you, a lav can be a solid choice. Personally, I don’t think the visibility of the mic will make or break your audition—but bad audio definitely can.
Shotgun & On-Camera Mics
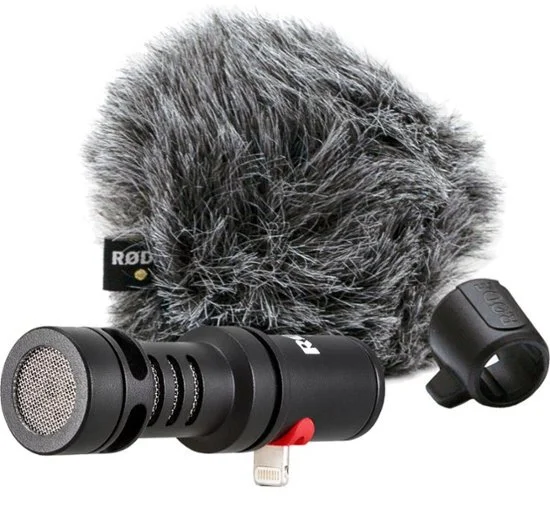
Rode-style mics can plug directly into your camera or smartphone, bypassing your device’s built-in mic so all the audio is recorded straight from the external mic. Many newer models connect via USB-C or Lightning adapters, making setup quick and tangle-free. Prices usually fall between $50 and $100.
They’re not as sensitive as lavaliers when it comes to picking up every little breath or whisper, but they’re still a big step up from standard device mics. Background hiss is greatly reduced, giving you clean, crisp audio. If the raw recording comes out a little soft, a quick run through your editing software’s audio enhancement feature usually boosts it to a professional level.
BONUS: Egg Crate Foam Padding To Reduce Echo
What Else Should I Focus On In A Self Tape?
Lighting and sound—check. Great! Now that the two biggest factors are sorted, let’s talk about the other details that can make or break your tape.
Tripod
If you’re still balancing your phone on a teetering stack of books and praying it doesn’t slide mid-scene… it’s time for an upgrade. Your camera needs to be steady, and a tripod is a simple, affordable fix. You can find solid options starting around $15–$30, and many now come with phone mounts and remote shutters. Just make sure it extends to your eye level—nothing throws off a tape like a camera that’s looking up your nose.
Background
The rule of thumb still holds: stick to a plain background in white, grey, or navy. Remove the gallery wall of family photos and your “Live, Laugh, Love” sign—nothing should pull focus from you. If you don’t have a plain wall, grab an inexpensive backdrop or even a flat bed sheet in a neutral color and secure it top to bottom so it drapes smoothly. Yes, it’s a little DIY, but your craft deserves it.
Wardrobe
Keep it simple and character-appropriate. Avoid busy patterns, neon brights, or anything that might moiré on camera. The goal is for your performance—not your outfit—to grab casting’s attention.
Framing
Aim for a frame that runs from just above the top of your head to about mid-to-high torso. Keep it tight—if the bottom of your frame is hovering near your belly button, you’re too far back. A good rule is to crop just below the shoulders with minimal empty space above your head. Of course, always follow any specific framing instructions from casting, as they may occasionally ask for something wider or closer.
A Good Reader
Skip the well-meaning-but-not-very-helpful options like your roommate, partner, or whoever happens to be walking by. Get an actor friend. A strong reader will feed you the right energy and timing, which makes it much easier for your best performance to shine through. Self-tapes live or die by the acting—don’t compromise on the person across from you.
Once your at-home self-tape setup is dialed in, you can focus on the fun part: the actual audition. And if you ever need a reader, there are now plenty of virtual reader services, actor networks, and even apps where you can instantly connect with experienced readers—so you’re never stuck with “flat line delivery guy” again.
See Below For The Full Gear List:
Best Self Tape Camera Under $500
▶ Sony ZV-IF: https://amzn.to/3w6mwAv (Amazon)
Best Self Tape Camera $500+
▶ Panasonic LUMIX: https://amzn.to/3w9kKyn (Amazon)
Best Ring Light
▶ Sensyne 10”: https://amzn.to/3UAAOT6 ( Amazon)
▶ UBeesize: https://amzn.to/3QHHLQj (Amazon)
Best Selfie Light
▶ Neewer: https://amzn.to/4dbg0Jl (Amazon)
Best Laptop Tripod Stand
▶ Popoko: https://amzn.to/3FzkHAR (Amazon)
Best Standing Tripod
▶ Bonfoto: https://amzn.to/3JB8mu8 (Amazon)
▶ Selfie Stick: https://amzn.to/3wadvGq (Amazon)
Best Desktop Tripod
▶ Fotopro: https://amzn.to/3UCMNQs (Amazon)
Best Soft Box Light
▶ Neewer 700W: https://amzn.to/3w6owsv (Amazon)
▶ HPSUN Softbox: https://amzn.to/3QHHLQj (Amazon)
Best Lavalier Microphone
▶ PoP Voice: https://amzn.to/3wkD4Vg (Amazon)
Best Directional Microphone
▶ Rode VideoMic Auxilary: https://amzn.to/3JzsJYz (Amazon)
▶ Rode VideoMic USB-C: https://amzn.to/3XKrRHt (Amazon)
Best Voice Over Microphone
▶ Audio Technica: https://amzn.to/3xPXhTj (Amazon)
Best Egg Crate Foam For Echo:
▶ Egg Crate: https://amzn.to/49RcTTX (Amazon)
Best Backdrop Stand For > 10ft Of Space
▶ Neewer Photo Stand: https://amzn.to/49VtLc8 (Amazon)
Best Backdrop Stand For < 10ft Of Space
▶ EMART: https://amzn.to/4baNwh8 (Amazon)
Best Backdrop
▶ Kate Reversible Dark Blue/Brown: https://amzn.to/3Uf5urU (Amazon)
▶ Kate Reversible Grey/Teal: https://amzn.to/3xQZgqL (Amazon)
Best Teleprompter
▶ Neewer: https://amzn.to/4dbg0Jl (Amazon)
Best SD Card:
▶ SanDisk 128GB: https://amzn.to/3WfS15x (Amazon)
Best Filming/Editing/Podcast Headphones
▶ OneOdio BT: https://amzn.to/44jfl4k (Amazon)
Best Camera Bag
▶ Tenba: https://amzn.to/44i0hnN (Amazon)